The first step is to ensure you've completed GTM integration with Thrive, if you haven't yet please follow this link to the instructions for the same: https://thrivenow.myfaqprime.com/293/install-integrate-google-manager-with-order-app-thrive-url
Once completed, open your GTM and the container that you integrated with Thrive.
For your reference, here is the list of the event objects that we're pushing to the data layer: https://thrivenow.myfaqprime.com/295/what-event-objects-pushed-into-the-thrive-website-data-layer
Now, firstly you've got to configure the Built-in Variables on GTM and create User Defined Variables.
Configure and enable all Pages & History Built-In Variables, they're as follows:
- History Source
- New History Fragment
- New History State
- Old History Fragment
- Old History State
- Page Hostname
- Referrer
Stuck? Check out how to create the Built-In Variables here: https://support.google.com/tagmanager/topic/7182737

Create New User Defined Data Layer Variables using the event object pushes available as follows:
- Order ID
- Order Type
- Product Name
- Product Price
- Total Price
- Total Quantity
* Note this list isn't exhaustive, you can create more variables from the keys in the different objects available in the data layer.
Refer to Step 3 for the list of event objects that are pushed to the data layer.
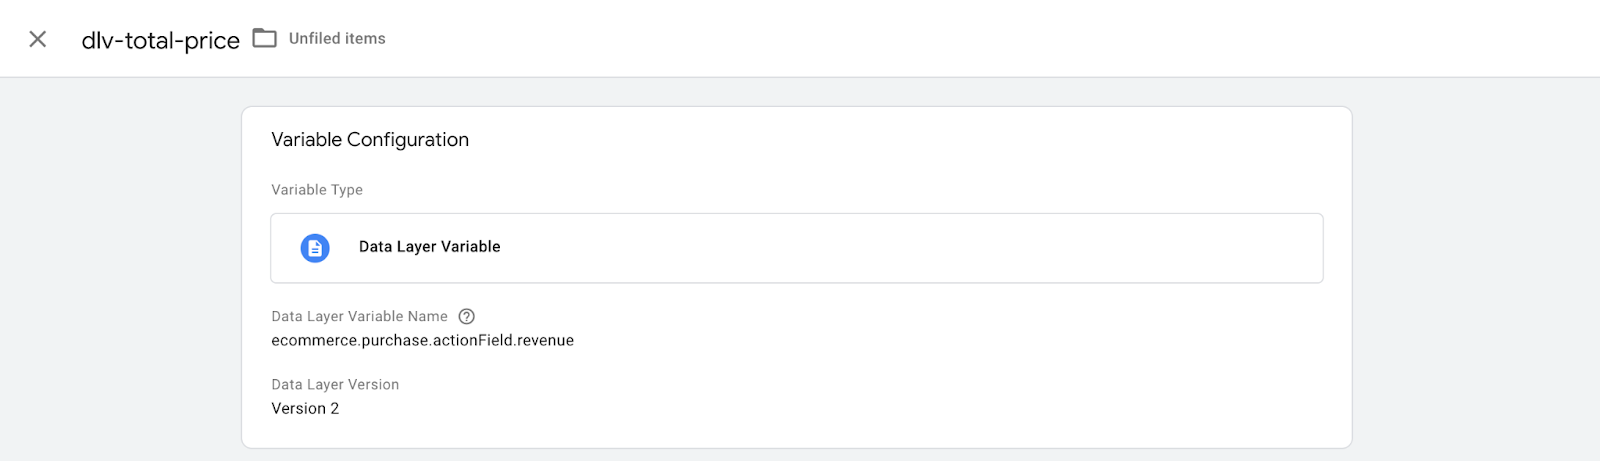
Ensure you choose Version 2 and the Variable Name field matches exactly to the string in the object.
Stuck? Check out how to create the User Defined Variables here: https://support.google.com/tagmanager/answer/7683362?hl=en&ref_topic=9125128
Check out this example of one such variable that has been created, which captures the total price of the items purchased by the customers.
Now, let's create the Triggers.
We'll be creating Custom Event Triggers for each of the event objects mentioned in Step 3, in the Event Name field enter the names as highlighted in Blue.
Here's an example of a Custom Event Trigger for that we created for the Checkout event, note how "eec.checkout" is entered in the Event Name and that firing is enabled for All Custom Events.

Here are the Custom Event triggers that we suggest creating:
- Ordering Type (Event Name: ordering_type)
- Add to Cart (Event Name: eec.add)
- Checkout (Event Name: eec.checkout)
- Purchase (Event Name: eec.purchase)
- Page View (Event Name: page_view)

Additionally we've also created a default History Change and Window Loaded trigger for all pages.
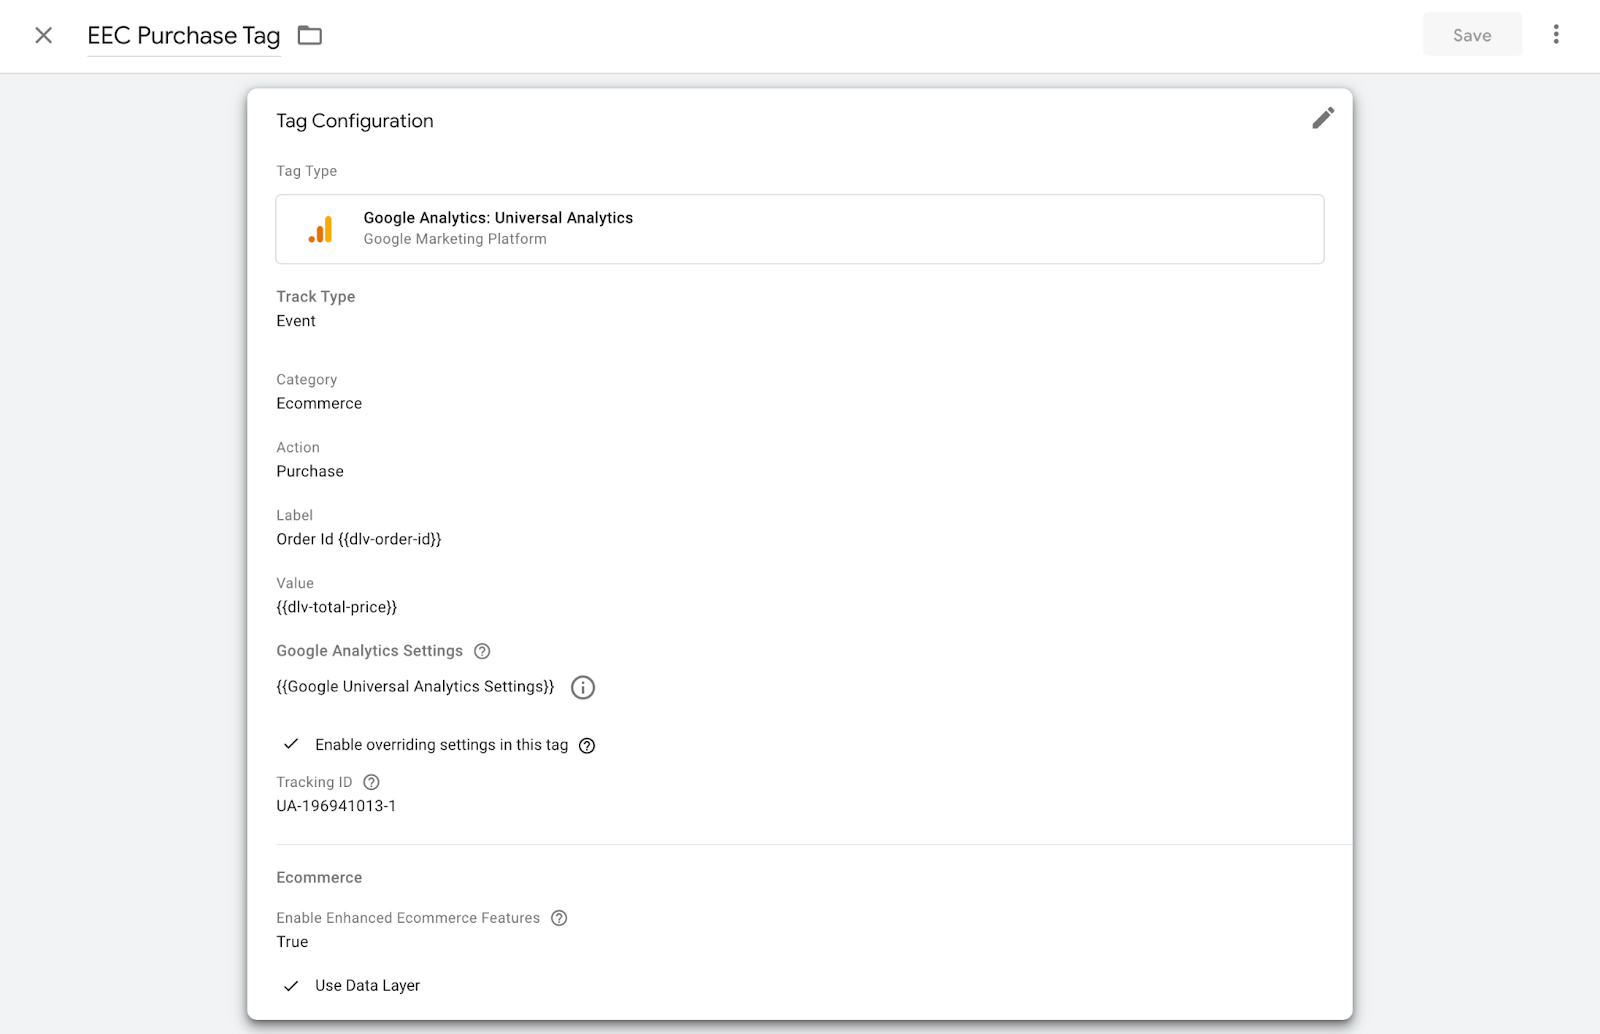
Lastly, it' time to create the Tags for the Triggers that we've made.
We'll be creating Universal Analytics Tags and the track type is Event.
Let's call the Category field as Ecommerce.
Let's call the Action field as event we're tracking, in this case Purchase
In the label, we're passing the Order ID (we created a Data Layer Variable for the same) of the purchase.
In the Value, we're passing the Total Price (we created a Data Layer Variable for the same) of the purchase.
*Note that you can name the fields as you require and pass values by creating and assigning different Data Layer Variables.
Use the general Universal Analytics Settings Variable you've created in Google Analytics Settings.
Enable overriding and in the Tracking ID mention the UA ID of the Google Analytics Container you want to pass the data to.
Lastly in More Settings within Ecommerce ensure that Enhanced Ecommerce is True. And check the Use Data Layer option.
Using the instructions mentioned above, setup your tracking as you require, once done Preview and see if the values are flowing in properly and Publish once satisfied.
In case you need any help, write to marketing@hashtagloyalty.com with your query. Please mark support@hashtagloyalty.com as cc in your mail.
